Couldn’t budget your time to deliver a PowerPoint presentation in person? Or you suffer terribly from stage fright when speaking in public? Whatever troubles you have, the mighty PowerPoint has its plan for you.
Yes, let’s do a voiceover on PowerPoint, then all problems solved. In this post, our visual expert shows you how to record a voiceover to PowerPoint in multiple ways using its full-featured audio-recording features and a versatile online screen recorder. So, let’s dive in.
Contents:
How to Do a Voiceover to PowerPoint Directly by Inserting An Audio
Inserting your audio narration directly to each slide is the most basic way to add a voiceover to a PowerPoint. And the PowerPoint offers us two ways to do so.
Option 1: Insert an Audio from Your PC
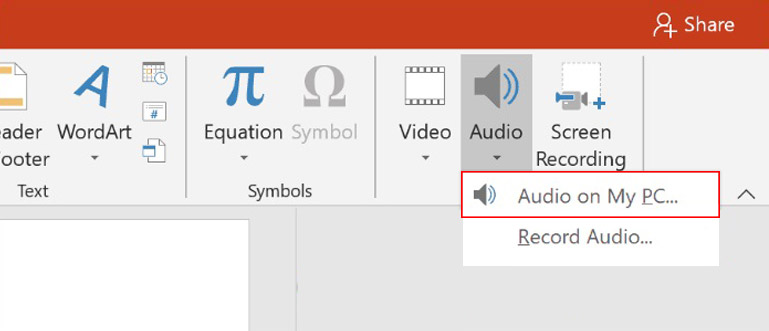
Directly import audio from your pc to PowerPoint
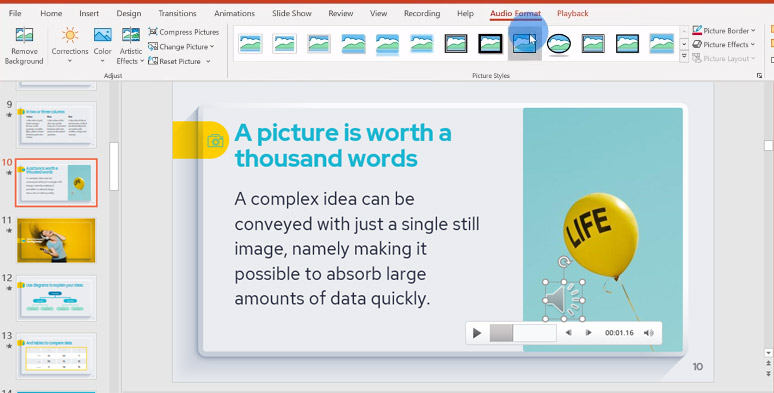
Then you can import a pre-recorded audio file to a particular slide of your PowerPoint. Once you insert it into a slide, an audio icon will appear. Move your cursor to this audio icon, you can play the audio. Check how to record any Chrome tab with audio.
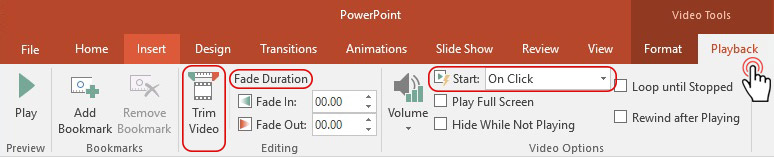
Use the “Playback” tab to customize the voiceover on PowerPoint
Option 2: Record a Voiceover
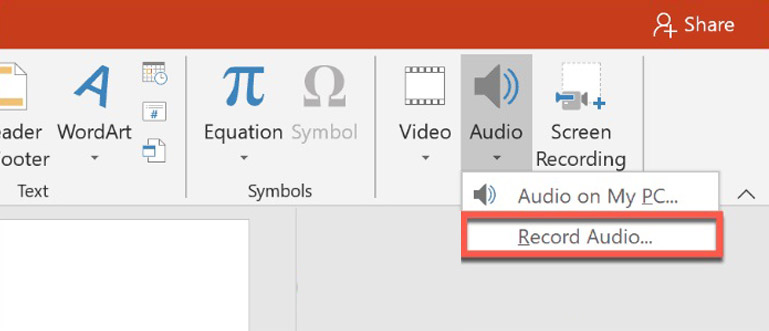
Press the “Record Audio” button to record a voiceover to a Powerpoint
Then a pop-up window will appear giving you the option to name this voiceover before recording. Do make sure you have your mic connected to your PC. Next, hit the red recording button and start talking, and your voice will automatically be recorded. Check top 5 online screen recorders with audio.
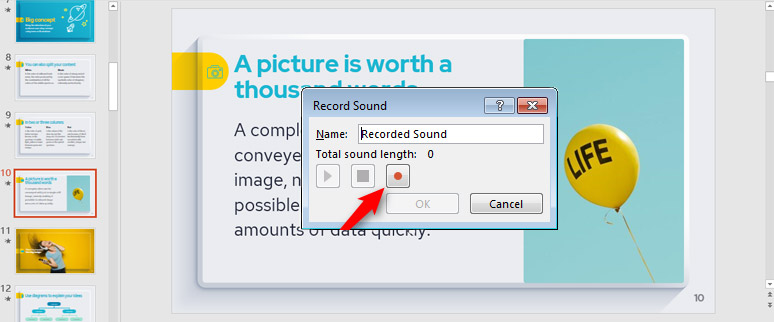
Press the record button to start recording a voiceover on PowerPoint
To stop the audio recording, press the stop button in the middle, and hit OK. Your voiceover will show up in the form of an audio icon.
Customize the audio format on PowerPoint
How to Do a Voiceover to PowerPoint While Recording the Slide Show
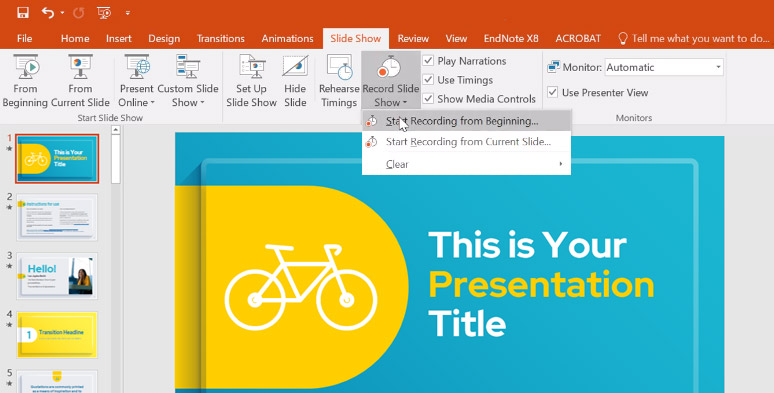
A flattering way to add a voiceover to PowerPoint is by using the “Record Slide Show” option. By doing so, you can screen record every page of your slide while recording a voiceover to each slide accordingly.
Then a pop-up window will appear. Make sure you check both two boxes because this tells the PowerPoint recorder to record all slides, animation timings, and your audio narration, etc. Then press “Start Recording”.
Start recording the voiceover and visual of a PowerPoint
Now, you can start talking and your voice will be recorded. Once you’ve done a voice-over for a specific slide, left-click to advance a slide. As a new slide appears, you can start speaking again, the recorder will again capture your voice and the visual of the new slide.
After you’ve recorded all the voiceovers, to end the recording, press the “Escape” button on your keyboard. Now, you can see that each slide is added with an audio icon. Click an audio icon to play the audio.
If you are not satisfied with a specific audio recording, click on this slide and press “Record Slide Show” > click on “Start Recording from Current Slide”. Then you can re-record a voice-over to this slide and the previous audio file will be written over.
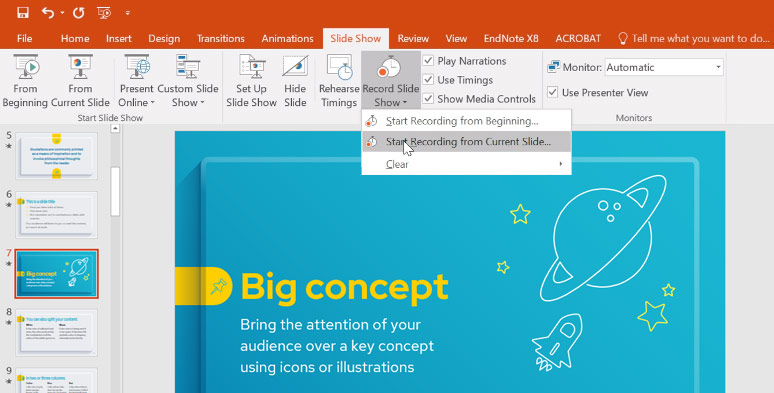
Start recording from the current slide
How You Export PowerPoint Also Matter
Now, you’ve added a voiceover to a PowerPoint. 90% of the people will save it as a simple PPT file. Yet, Microsoft PowerPoint offers us another option to export the slide show as an MP4 video (1080P), which makes it easy for circulating this virtual presentation online.
How to do it? Simple. Click on “File” > Scroll down to “Export” > Click on “ Create a Video” > Choose “Computer & HD Displays (1920x1080) > Hit “Create a Video” to export the MP4 file to your local computer.
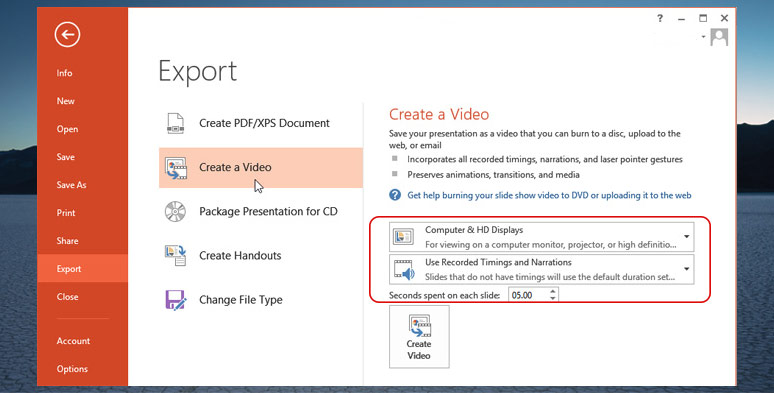
Export recorded PowerPoint as a high-quality video
How to Do a Voiceover to PowerPoint Using RecordCast
Though Microsoft PowerPoint offers us different options to do a voiceover to our PPT, for non-conformists like you, having more control of the whole recording and editing process sounds more appealing.
In this case, using RecordCast, a free and versatile online screen recorder, and video editor, to record a voiceover to PowerPoint, could be a game-changer.
Use RecordCast to record both voiceover and video of a PowerPoint
If you only want to record the PowerPoint slide with voiceover, Choose “Screen Only + Microphone “ will suffice. If you want to create a picture in picture effect like what you see in a video tutorial on YouTube, then the combo of “ Screen +Webcam + Microphone + System Audio” will do the job.
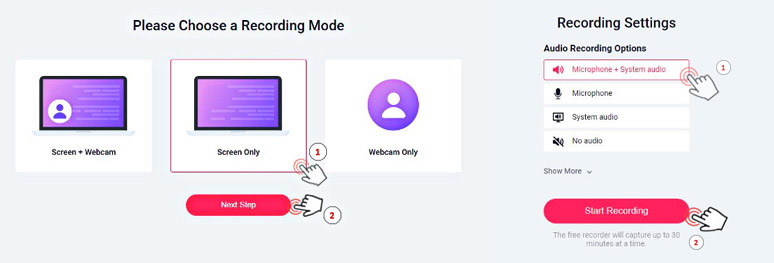
Set up the video and audio recording setting for a PowerPoint
After you set up the basic settings for the video and audio recording, then click on “Start Recording”. A pop-up window will appear. Next, click on “Application Window” > select PowerPoint App> Check “Share Audio” and “Share” button > press “ Start Recording”.
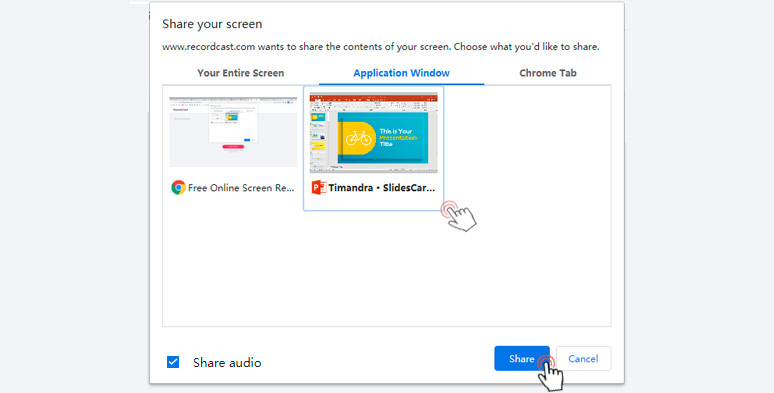
Select the PowerPoint’s application window for recording
Then you can play the slide and start talking. RecordCast can record the video and your voiceover simultaneously.
Once you finish the recording, press the “Stop Sharing” button. Then, go back to RecordCast, now you can playback the recording. Hit the “Download and Edit” button. Your PowerPoint recording with voiceover will be download in WebM format to your local computer.
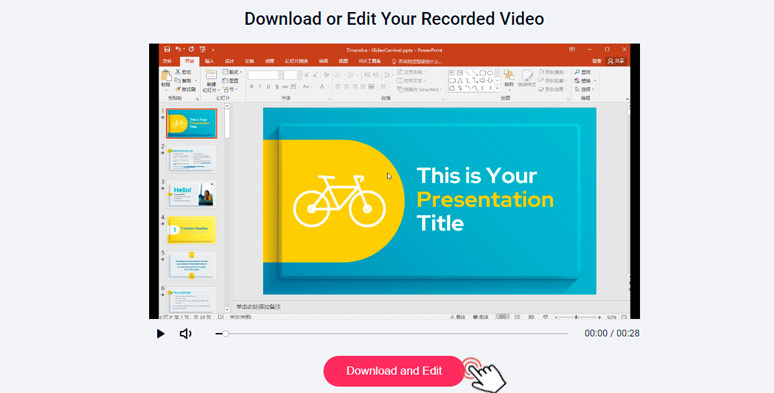
Download and edit the recorded PowerPoint slides
Meanwhile, you will be automatically directed to the built-in video editor of RecordCast, where you can place the recording on the timeline and trim your recording, add expertly designed text effects, dynamic emojis, and dazzling overlays or import images, audio or videos to enhance the whole PowerPoint recording.
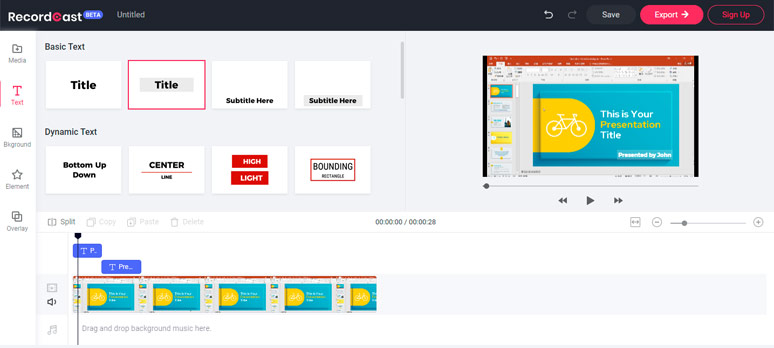
Edit recorded PowerPoint slides in RecordCast’s video editor
Finally, after everything is done, hit the “Export” button to download an exquisitely-made PowerPoint video with voiceover in MP4 (1080P) to the local document folder.
Final Thoughts
To sum up, you use the “Insert Audio” feature and “Record Slide Show” feature of PowerPoint to easily do a voiceover to your PowerPoint presentation accordingly. If you prefer more control of your recording, using RecordCast to add a voiceover to PowerPoint gives you more flexibility.
So, hopefully, you find our suggestions and advice helpful and if you come up with a better way to record a PowerPoint presentation with audio, don’t hesitate to tell us.

Hot & Trending
-

How to Record Yourself and Your Screen at the Same Time on PC/Mac
-

How to Record Any Chrome Tab with Audio in Clicks
-

8 Best Free Screen Recorders with No Watermark
-

Top 19 Tips and Tricks to Record Presentations as a Video
-

How to Record Facebook Video Calls with both Video and Audio on Desktop, iPhone, Android
-

How to Record Google Meet for Free Gmail Users (PC & Mobile)
-

Best Way to Record Gameplay on PC 2021
-

Best Ways to Record an Interview with High-quality Audio and Video on Mac