Microsoft Teams offers us an easy way to record a meeting and share it in multiple ways with colleagues or students who couldn’t make it for the scheduled meeting.
In this post, we will cover some flexible ways to record on Microsoft Teams both as the host and an attendee of the meeting with proven strategies to get the job done with ease.
Contents:
How to Record on Microsoft Teams Meeting As a Host
First and foremost, to be able to record Microsoft Teams meetings, you have to meet the following requirements:
How Do I Enable Recording in Microsoft Teams
As the host, you can even pre-record a Microsoft Teams meeting before the scheduled meeting begins.
Hover to the meeting control toolbar and click on the “Share” button. Then, you can upload your PowerPoint presentation to Microsoft Teams. Find out how to do a voiceover on PowerPoint.
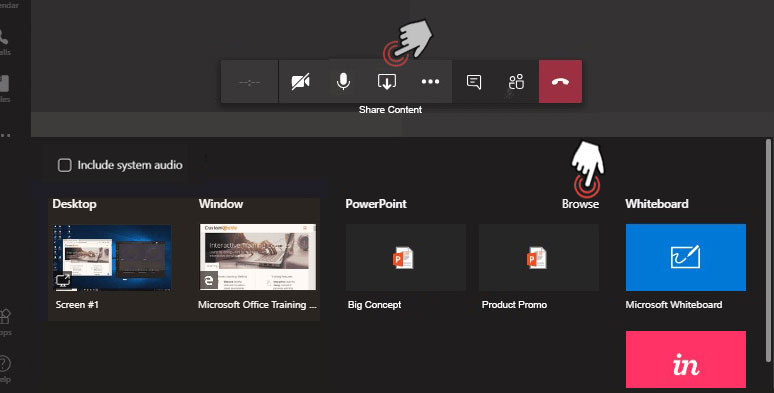
Share a PowerPoint to Microsoft Teams
Click on the “More Actions” tab, which looks like three dots on the meeting control bar > tap “Start Recording”. Then everyone will get notified that you are recording the meeting. You can keep playing PowerPoint and recording both video and audio of your meeting.
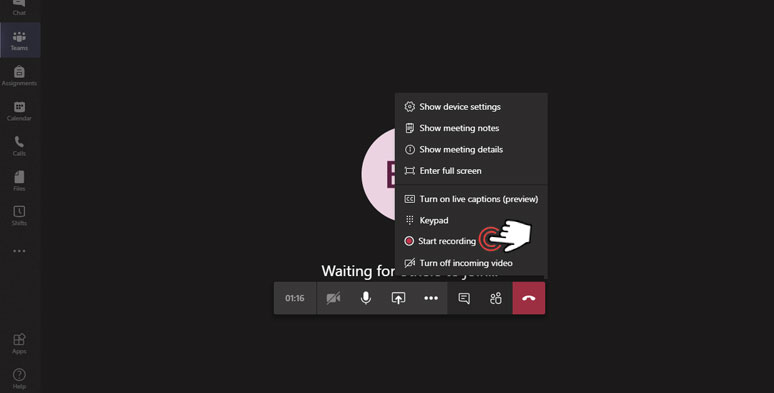
Start recording Microsoft Teams Meetings
How to Stop Recording in Microsoft Teams
Again, hover over to “More Actions” on Mircosoft Teams’ control bar > click on “Stop Recording”. Meanwhile, a notification will pop up at the top reminding you that your recording will be processed and saved in Microsoft Stream. Then, you can press the “Hang Up” button to leave the meeting.
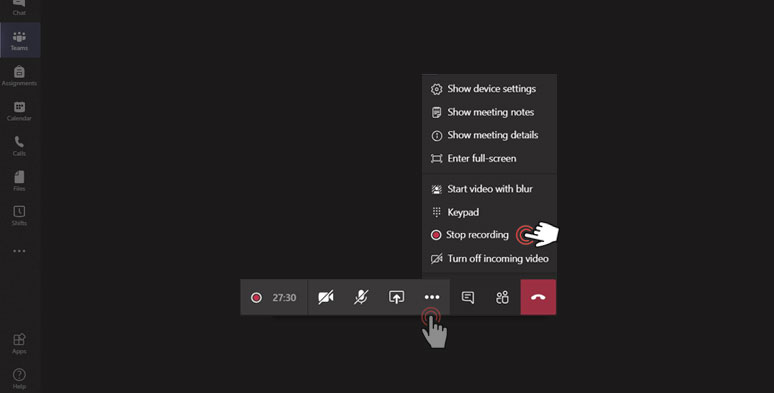
Stop recording on Mircosoft Teams
How to Find Recorded Meetings in Microsoft Teams
Microsoft Teams offers you 3 options to find the recording of the meeting:
Option 1: Go to Microsoft Steam > select “My Content” at the top menu bar > scroll down to tap “ Meetings”. You can see your latest meeting recording with details as to who recorded the meeting and who organized the meeting and the place and date of the meeting.
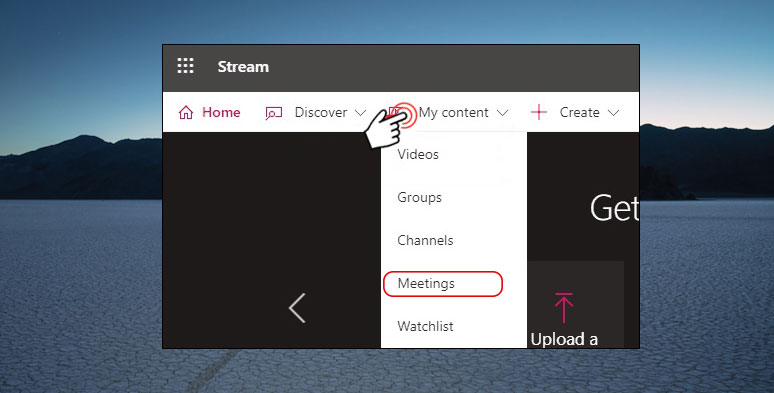
Find Microsoft Teams’ recording in Microsoft Stream
Option 2: Click on the “Show Conversation” tab on the control bar > the recording will show up in the meeting chat.
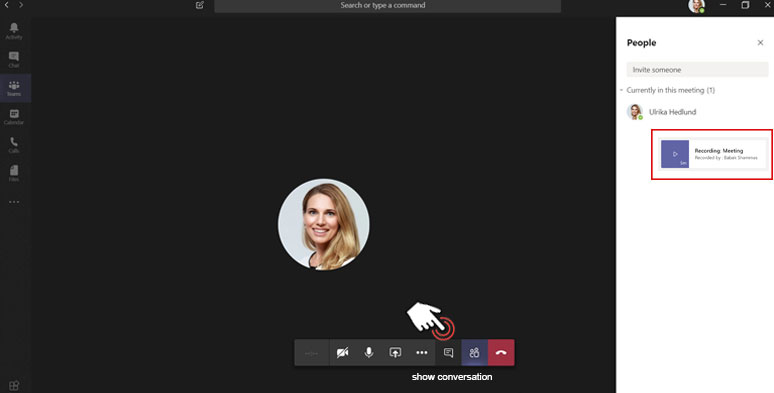
microsoft-teams-show-conversation-find-recording
Option 3: Hover over to the left toolbar. Click on the “Chat” button > find the latest meeting recording.
Find Stream’s app first and then find recording
Yet, this method only works for the host of the meeting. If you are a participant, you still have to retrieve the recording in the chatbox on that specific meeting date.
How to Share Teams Recording with External Users
Tap the “Show Conversation” tab in the meeting control bar > find your recording in the Meeting Chatbox > click on “3 dots”. Then, you can opt to open it in Microsoft Stream; share the recording directly to someone, or get a sharable link for easy sharing. Also, read how to record a Zoom meeting as a participant.
How to Record on Microsoft Teams Meeting As a Host
Well, though Microsoft Teams has impeccable features for meeting recording and sharing, its ability to record Teams meetings is only available to the host of the meeting.
Every so often, as a participant of the large meeting, you do find a need to record the teams meeting without the other person knowing and look back on it yourself later.
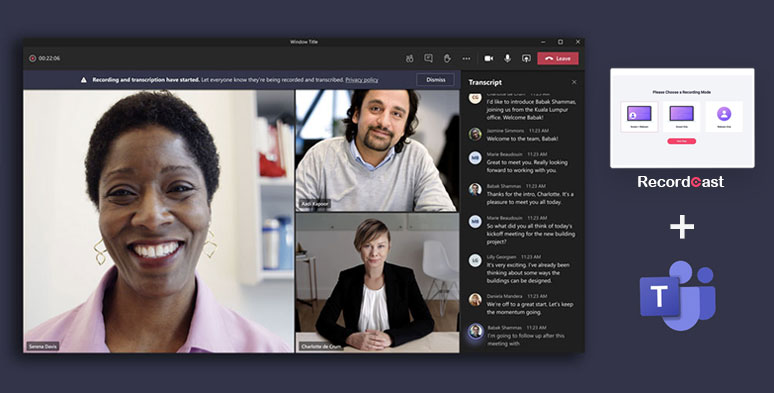
Use RecordCast to record on Microsoft Teams
To that end, a viable option is to use a free and easy-to-use screen recorder. To most busy business professionals and computer novices, using RecordCast, a versatile online screen recorder and video editor, will help you get the job done in a breeze.
How to Use RecordCast to Record Microsoft Teams Meeting
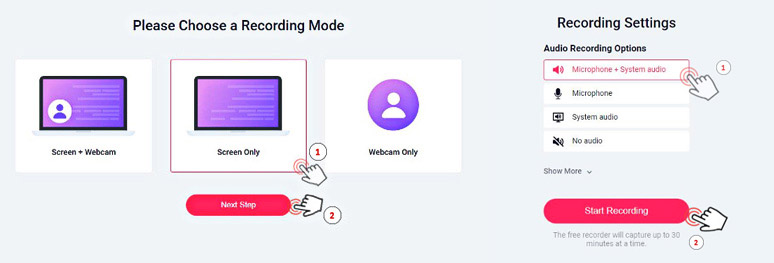
Choose video and audio recording mode
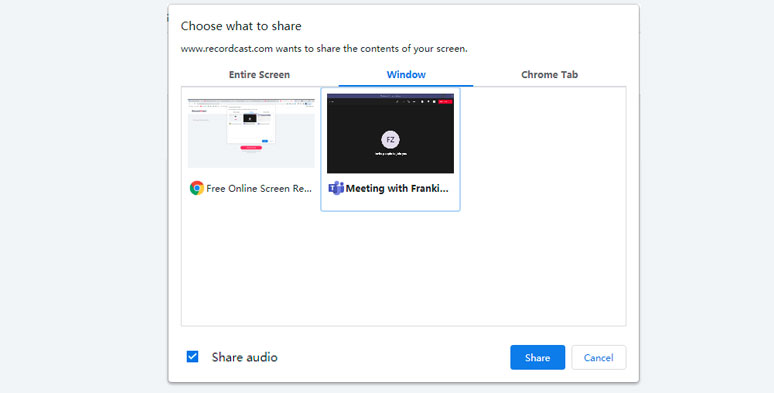
Use Microsoft Teams’ app window for recording
After the end of the meeting, press the “Stop“ sharing button. Then, go back to RecordCast’s webpage, where you can preview the recording.

Edit Teams’ recordings by RecordCast video editor
Next, by pressing the “download and edit it” button, you can use RecordCast’s built-in video editor to trim the recording and add subtitles, dynamic elements, and colorful backgrounds to divide the Teams meeting recording into different chapters. You can even import audio, images, and video footage to turn the recording into an eye-catching video.
Finally, after you’ve done the editing, you can press the “Export” button to export video in MP4 in 1080p to your local drive.
Final Thoughts
To sum up, to record Microsoft Teams meeting, you have to be the host of the meeting and at least have premium Office 365 for business. Meanwhile, you can use the recording tool in the meet’s control bar to record a Teams’ meeting and find your recording in Meet Chat and Microsoft Stream.
If you are a frequent user of Microsoft Teams for attending a large meeting, using RecordCast to record Teams meeting secretly works exactly for you.

Hot & Trending
-

How to Record Yourself and Your Screen at the Same Time on PC/Mac
-

How to Record Any Chrome Tab with Audio in Clicks
-

8 Best Free Screen Recorders with No Watermark
-

Top 19 Tips and Tricks to Record Presentations as a Video
-

How to Record Facebook Video Calls with both Video and Audio on Desktop, iPhone, Android
-

How to Record Google Meet for Free Gmail Users (PC & Mobile)
-

Best Way to Record Gameplay on PC 2021
-

Best Ways to Record an Interview with High-quality Audio and Video on Mac